A Beginner's Guide to Web3.js


Curious about the world of web3 development? If you're a beginner coder or a web developer eager to explore, this friendly guide is your starting point for the basics of Ethereum development. We'll keep it simple, focusing on the essentials, with web3.js as your gateway into Ethereum. Let's go!
What is web3.js?
Web3.js is a powerful TypeScript library that functions as a communication link between decentralized applications (dApps) and any Ethereum Virtual Machine (EVM)-compatible blockchain.
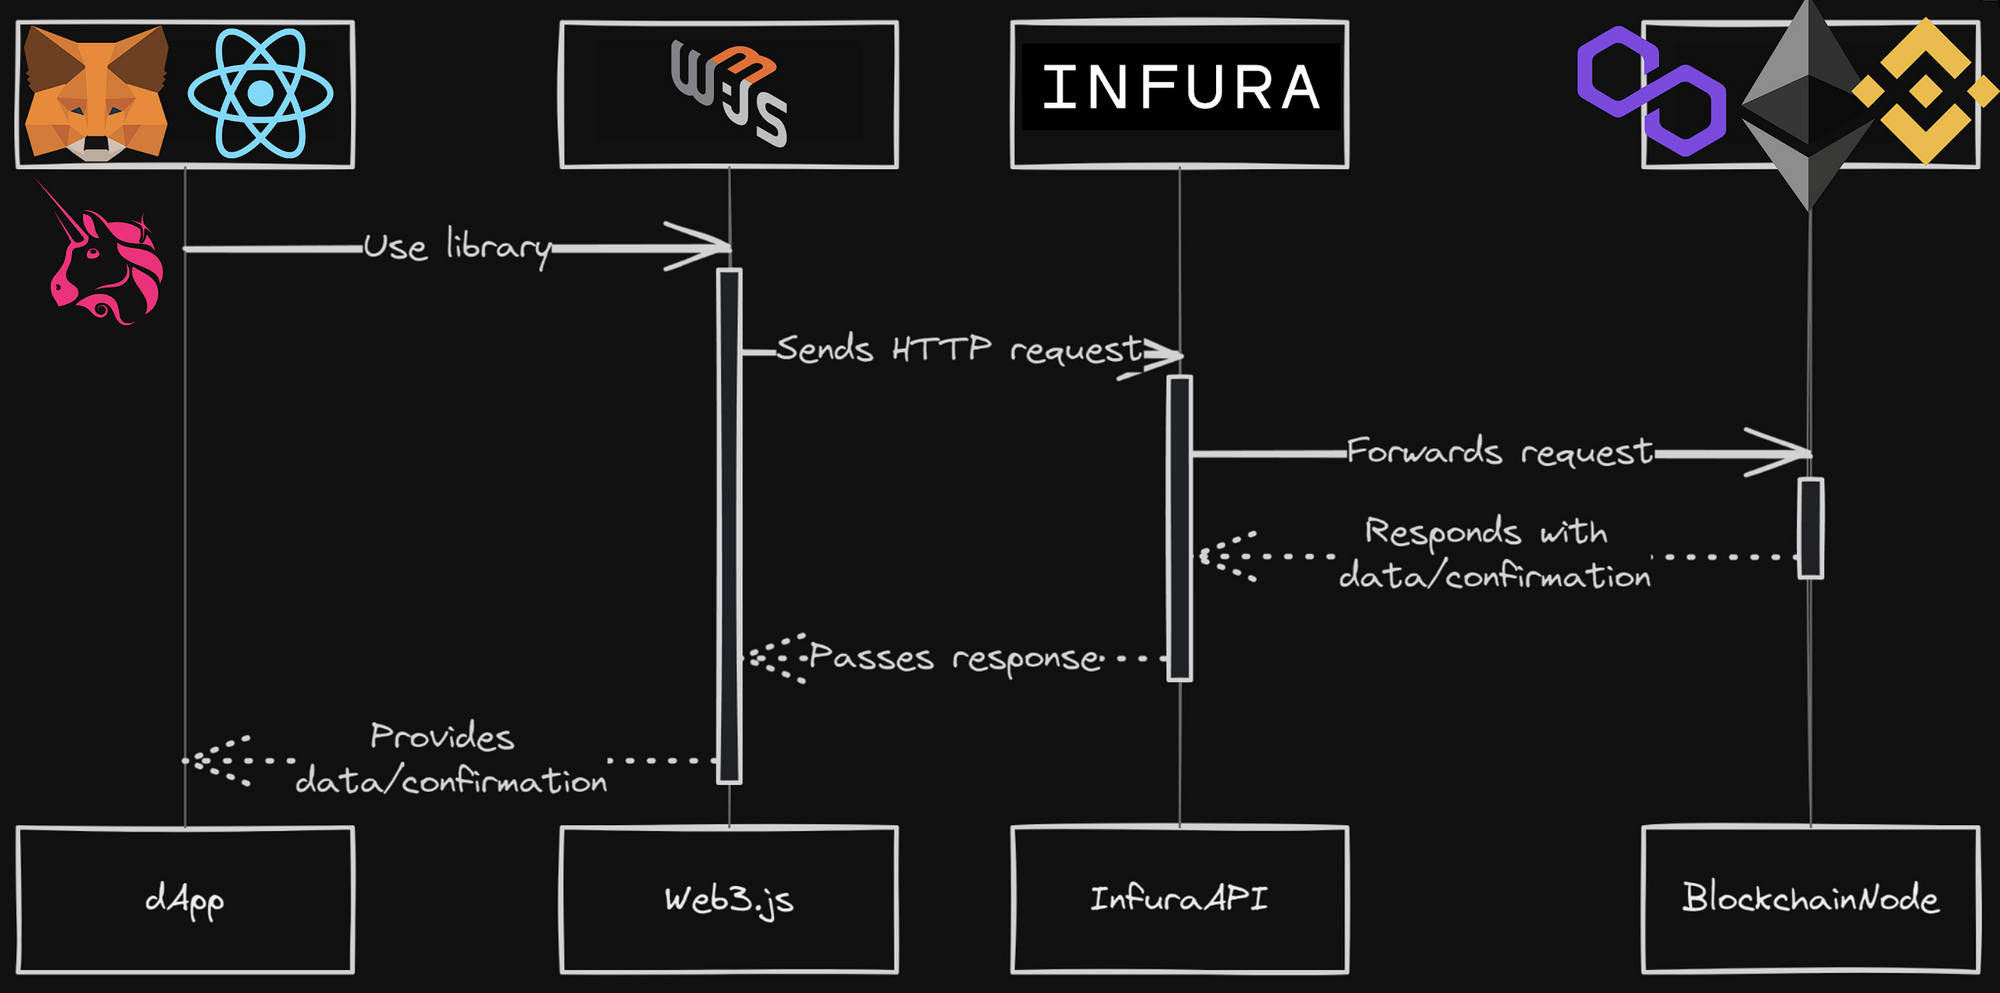
In the diagram below, you can see that when a user interacts with a dApp (e.g., Uniswap), web3.js acts as a helper, initiating an (HTTP, WSS, or IPC) request to Infura or another provider (like a connection point to the blockchain nodes) of your choice.
This request is then forwarded to a blockchain node, where the node responds by reading or writing data on the blockchain. Essentially, web3.js simplifies the communication process between your dApp and the blockchain, making it easier for them to understand each other.
Why use web3.js?
You might be thinking, why should I bother with web3.js? Well, it's pretty simple; it makes your life as a developer easier.
Instead of dealing with complicated requests in a language called JSON RPC to talk to the blockchain, you can just use web3.js. It's like a friendlier translator between your dApp and the blockchain.

Who is behind web3.js?
Web3.js is a true community-built project that has been shaped by various people over the years. It started in 2014 with Jeffrey Wilcke, one of the originators of Ethereum. Merek Kotewicz from Parity Tech took over in 2017, and Fabian Vogelsteller improved it in 2019.
Samuel Furter led from 2018, stabilizing version 1.x. In 2019, Ryan Ghods and Christopher Gewecke from EthereumJS made it more reliable. In June 2020, ChainSafe took over as a lead maintainer with a mission to enhance the developer experience and broaden the web3 development ecosystem.
Web3.js has been used by many of the biggest projects in web3.
To name a few:
- Hardhat
- Remix IDE
- OpenZeppelin
- Chainlink
- MetaMask
- Uniswap
- Kleros
- Truffle
- Polygon
Modernizing the library: web3.js v4 is here!
As part of its maintenance, ChainSafe has completely revamped web3.js from the ground up. Web3.js v4 introduces TypeScript compatibility, supporting both JavaScript and TypeScript through ECMAScript and CommonJS imports. This enhances flexibility for developers.
Additional benefits include a significant size reduction to 156kb, optimization of project space, and improvement of overall efficiency and loading times. The new version also introduces a game-changing plugin feature, empowering developers to add extended functionality to web3.js (more about plugins here).
If you want to learn more about the 4.x release, please read Announcing the Full Release of Web3.js V4
Web3.js Installation
Prerequisites
- NodeJS: you can download NodeJS from https://nodejs.org/en/download
- Code editor: feel free to download any code editor, but VSCode is user-friendly and highly recommended https://code.visualstudio.com/download
Create your NodeJS project
The first thing we have to do is to create a folder and open VSCode in that folder (in an example case, it's the "article1" folder, as you can see in the path: santiagotrujilloz@LAPTOP-9EM7B6QH:~/ChainSafe/web3.js-articles/article1)
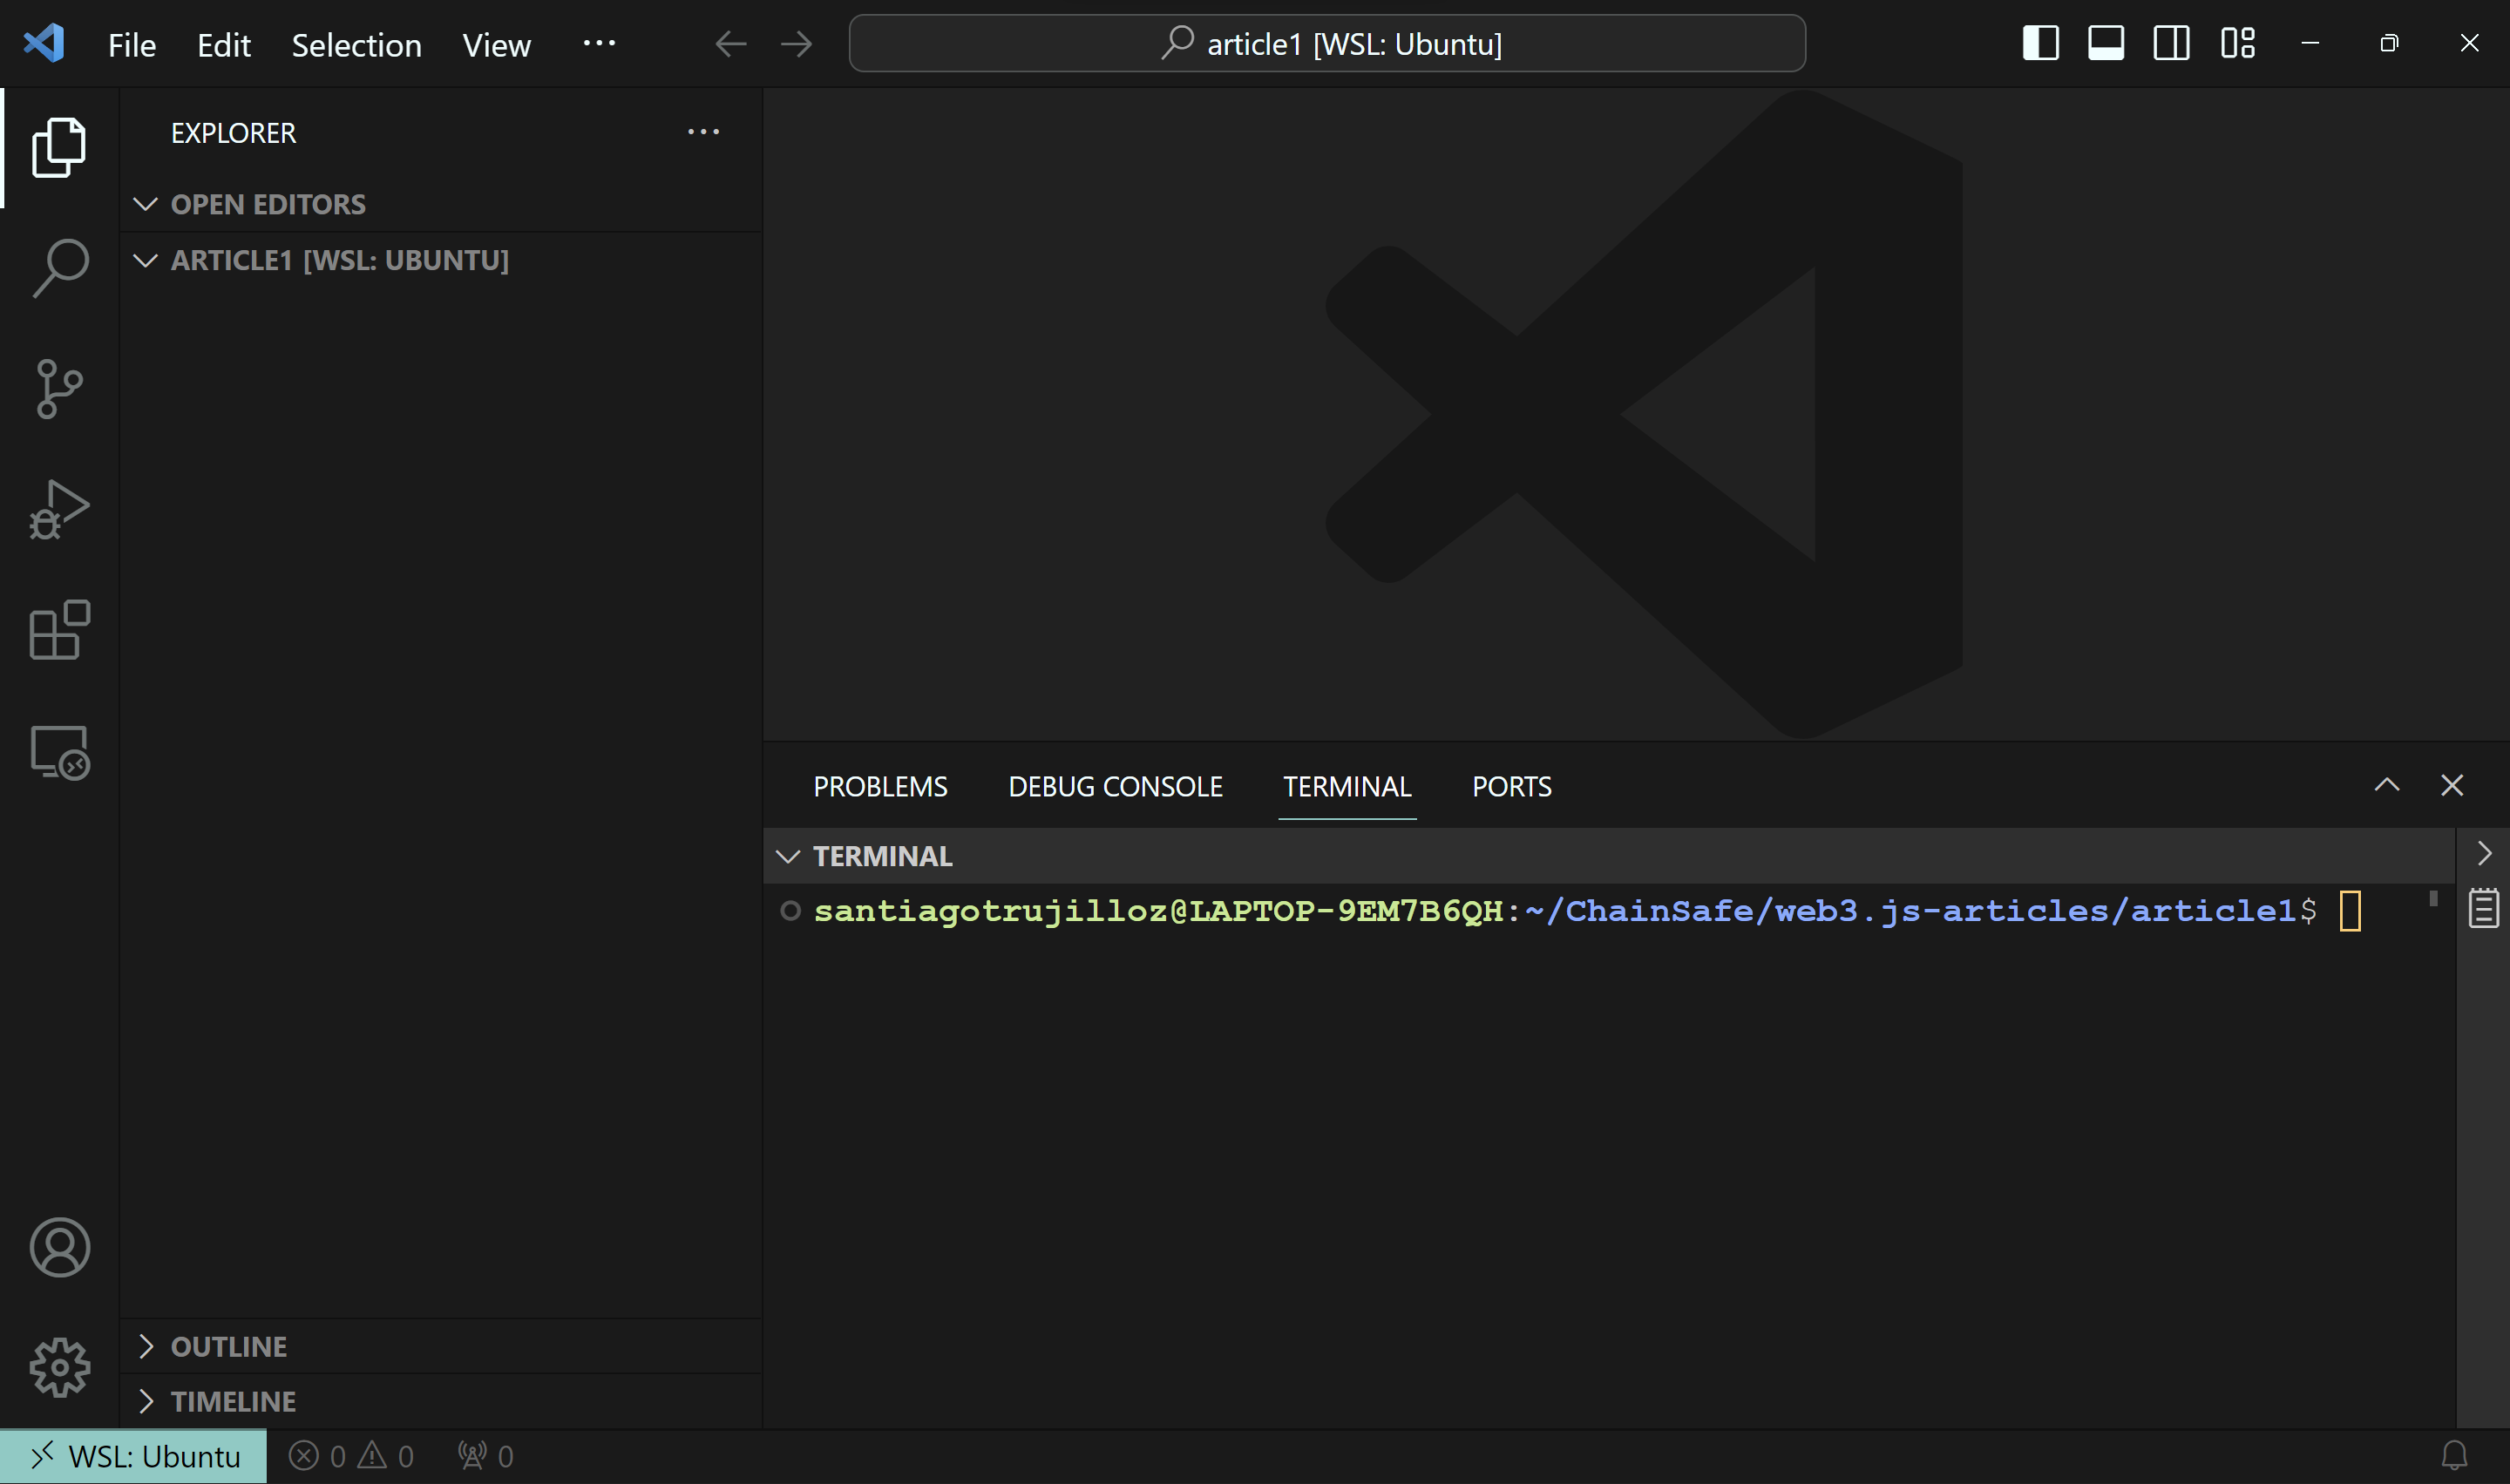
We can see the folder is empty, so let's open a terminal to create a NodeJS project (you can open your terminal by pressing Ctrl+Shift+`).

Now, we can create a NodeJS project by running the command in your terminal:
npm init -y
and you'll see a new file package.json created.
Install web3.js
Open your terminal and run the command:
npm i web3
After successful installation, you will see a new dependency in your package.json:
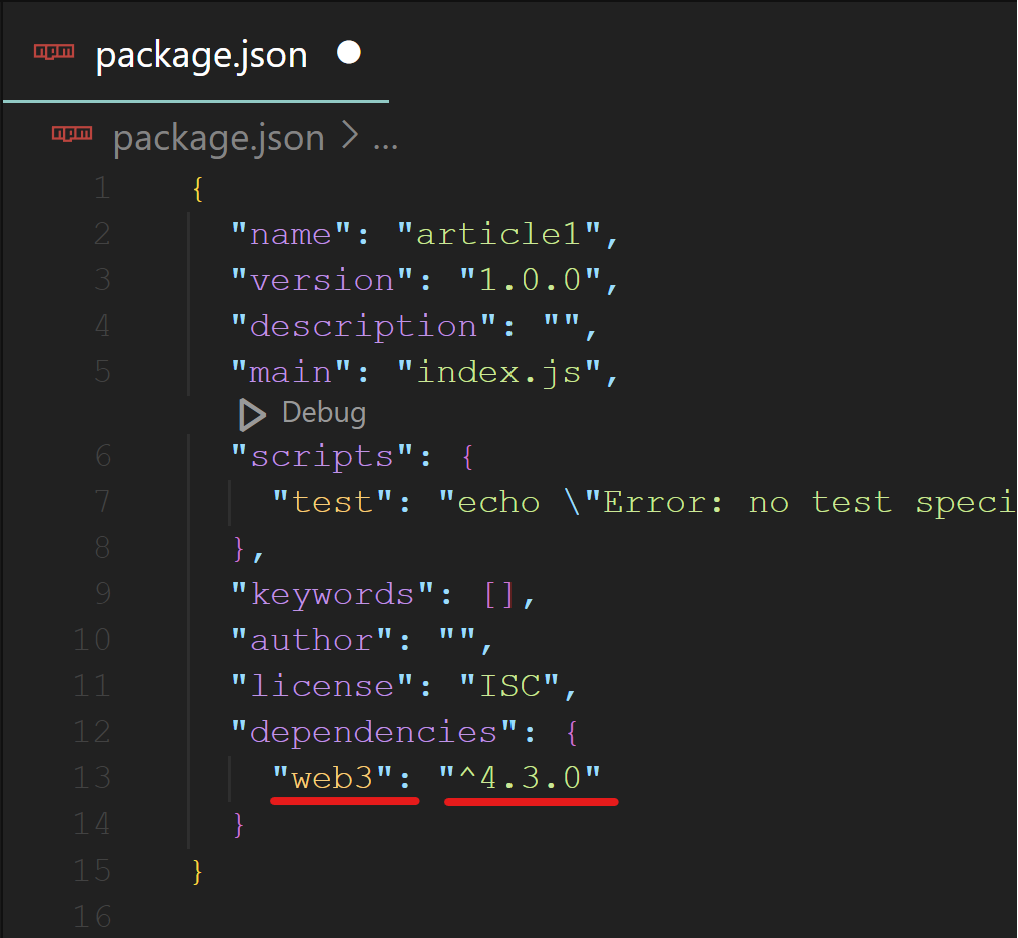
Now, we're ready to rock! 🚀🤘
Using web3.js
web3 provider
A web3 provider is like a courier that helps your application talk to the blockchain. It's essential for fetching data and making transactions on the blockchain. We will use Infura, which provides an endpoint (blockchain node) to connect to the Ethereum blockchain.
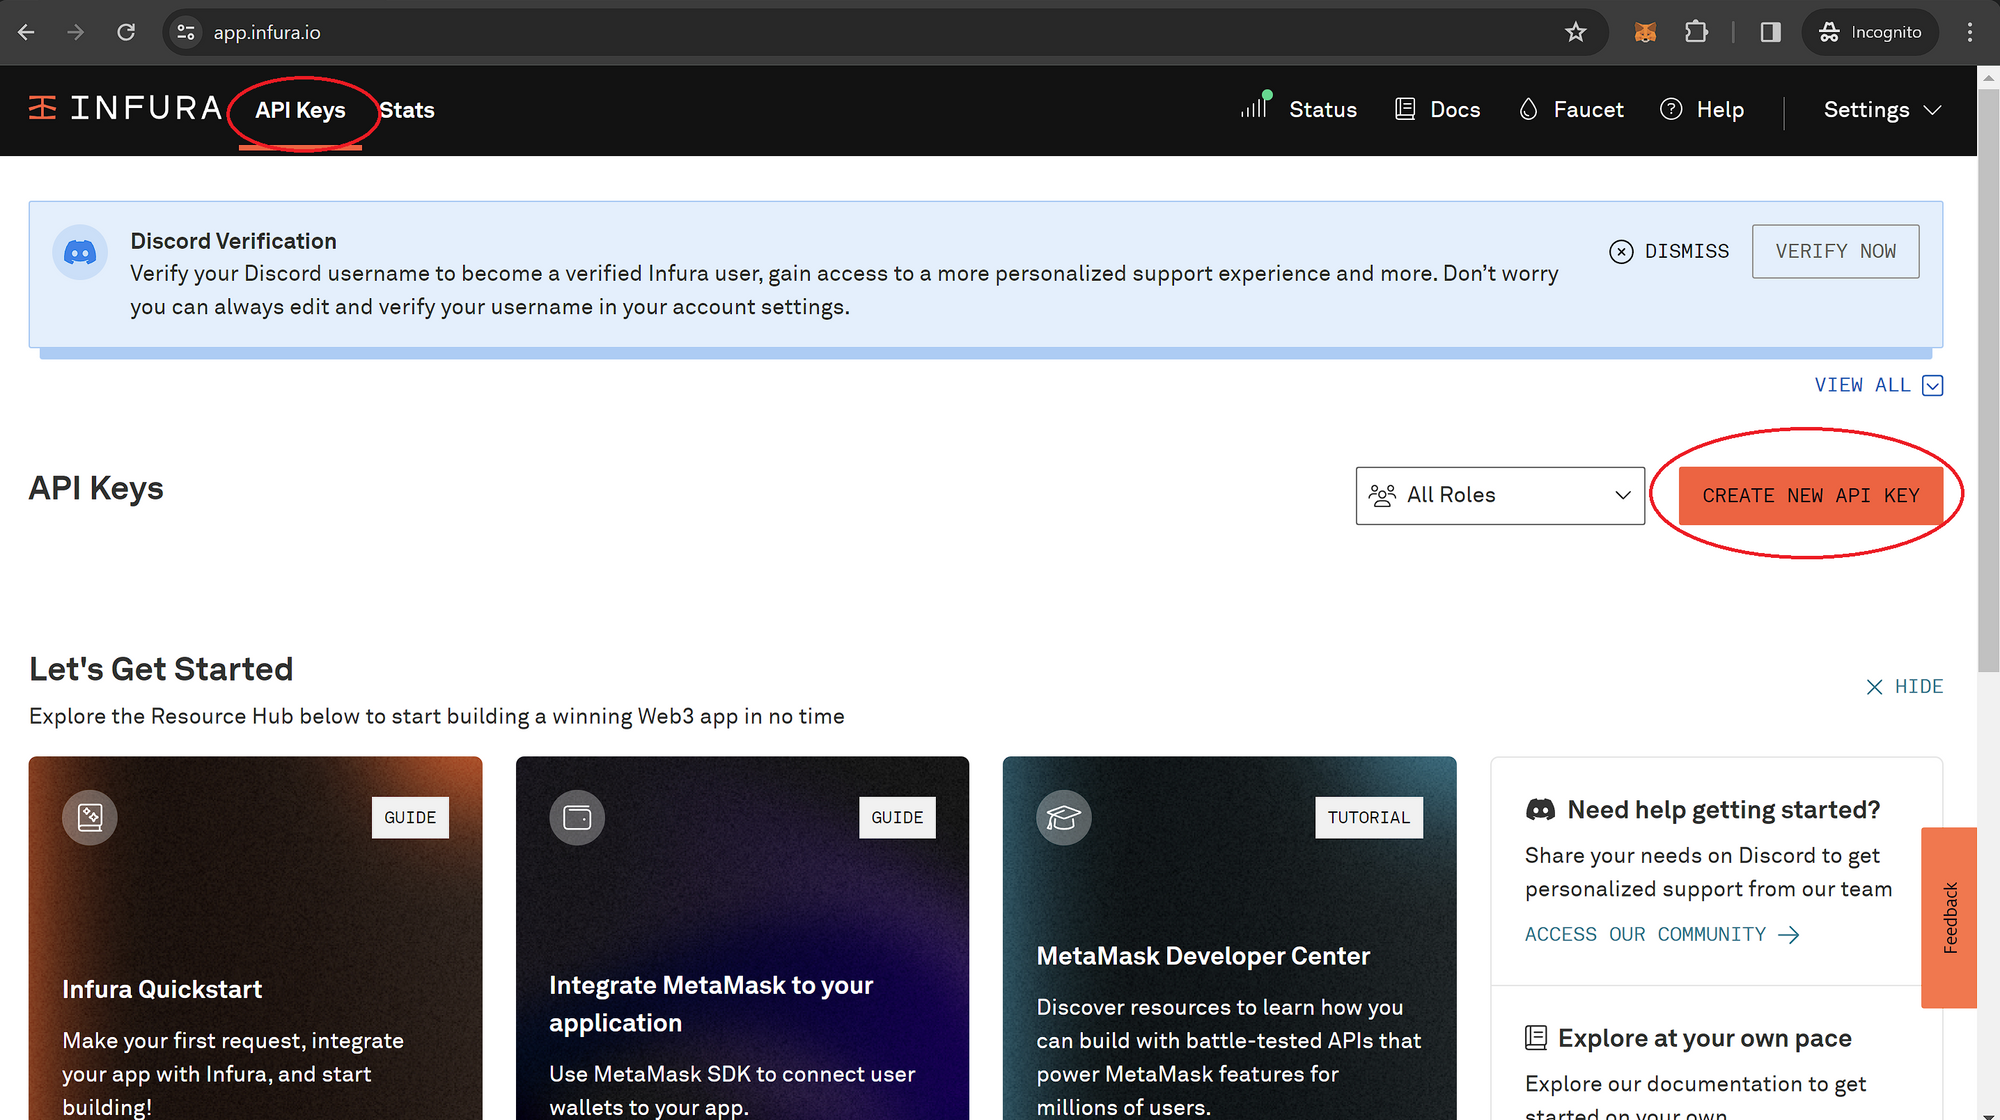
- Go to https://www.infura.io/, and create an account
- Log in to your account and go to API Keys
- Click on 'CREATE A NEW API KEY'
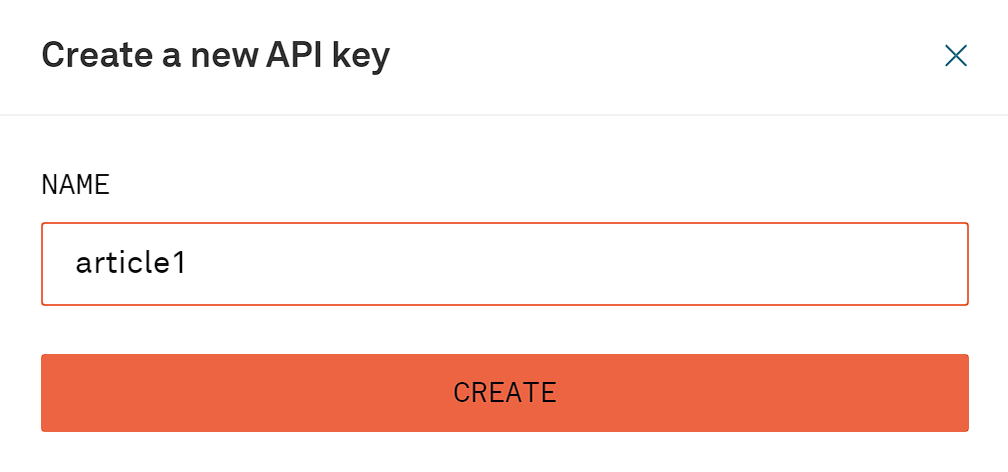
- Name your key (any name is OK)
- Go to 'All Endpoints,' check in Ethereum Mainnet, and save the changes.
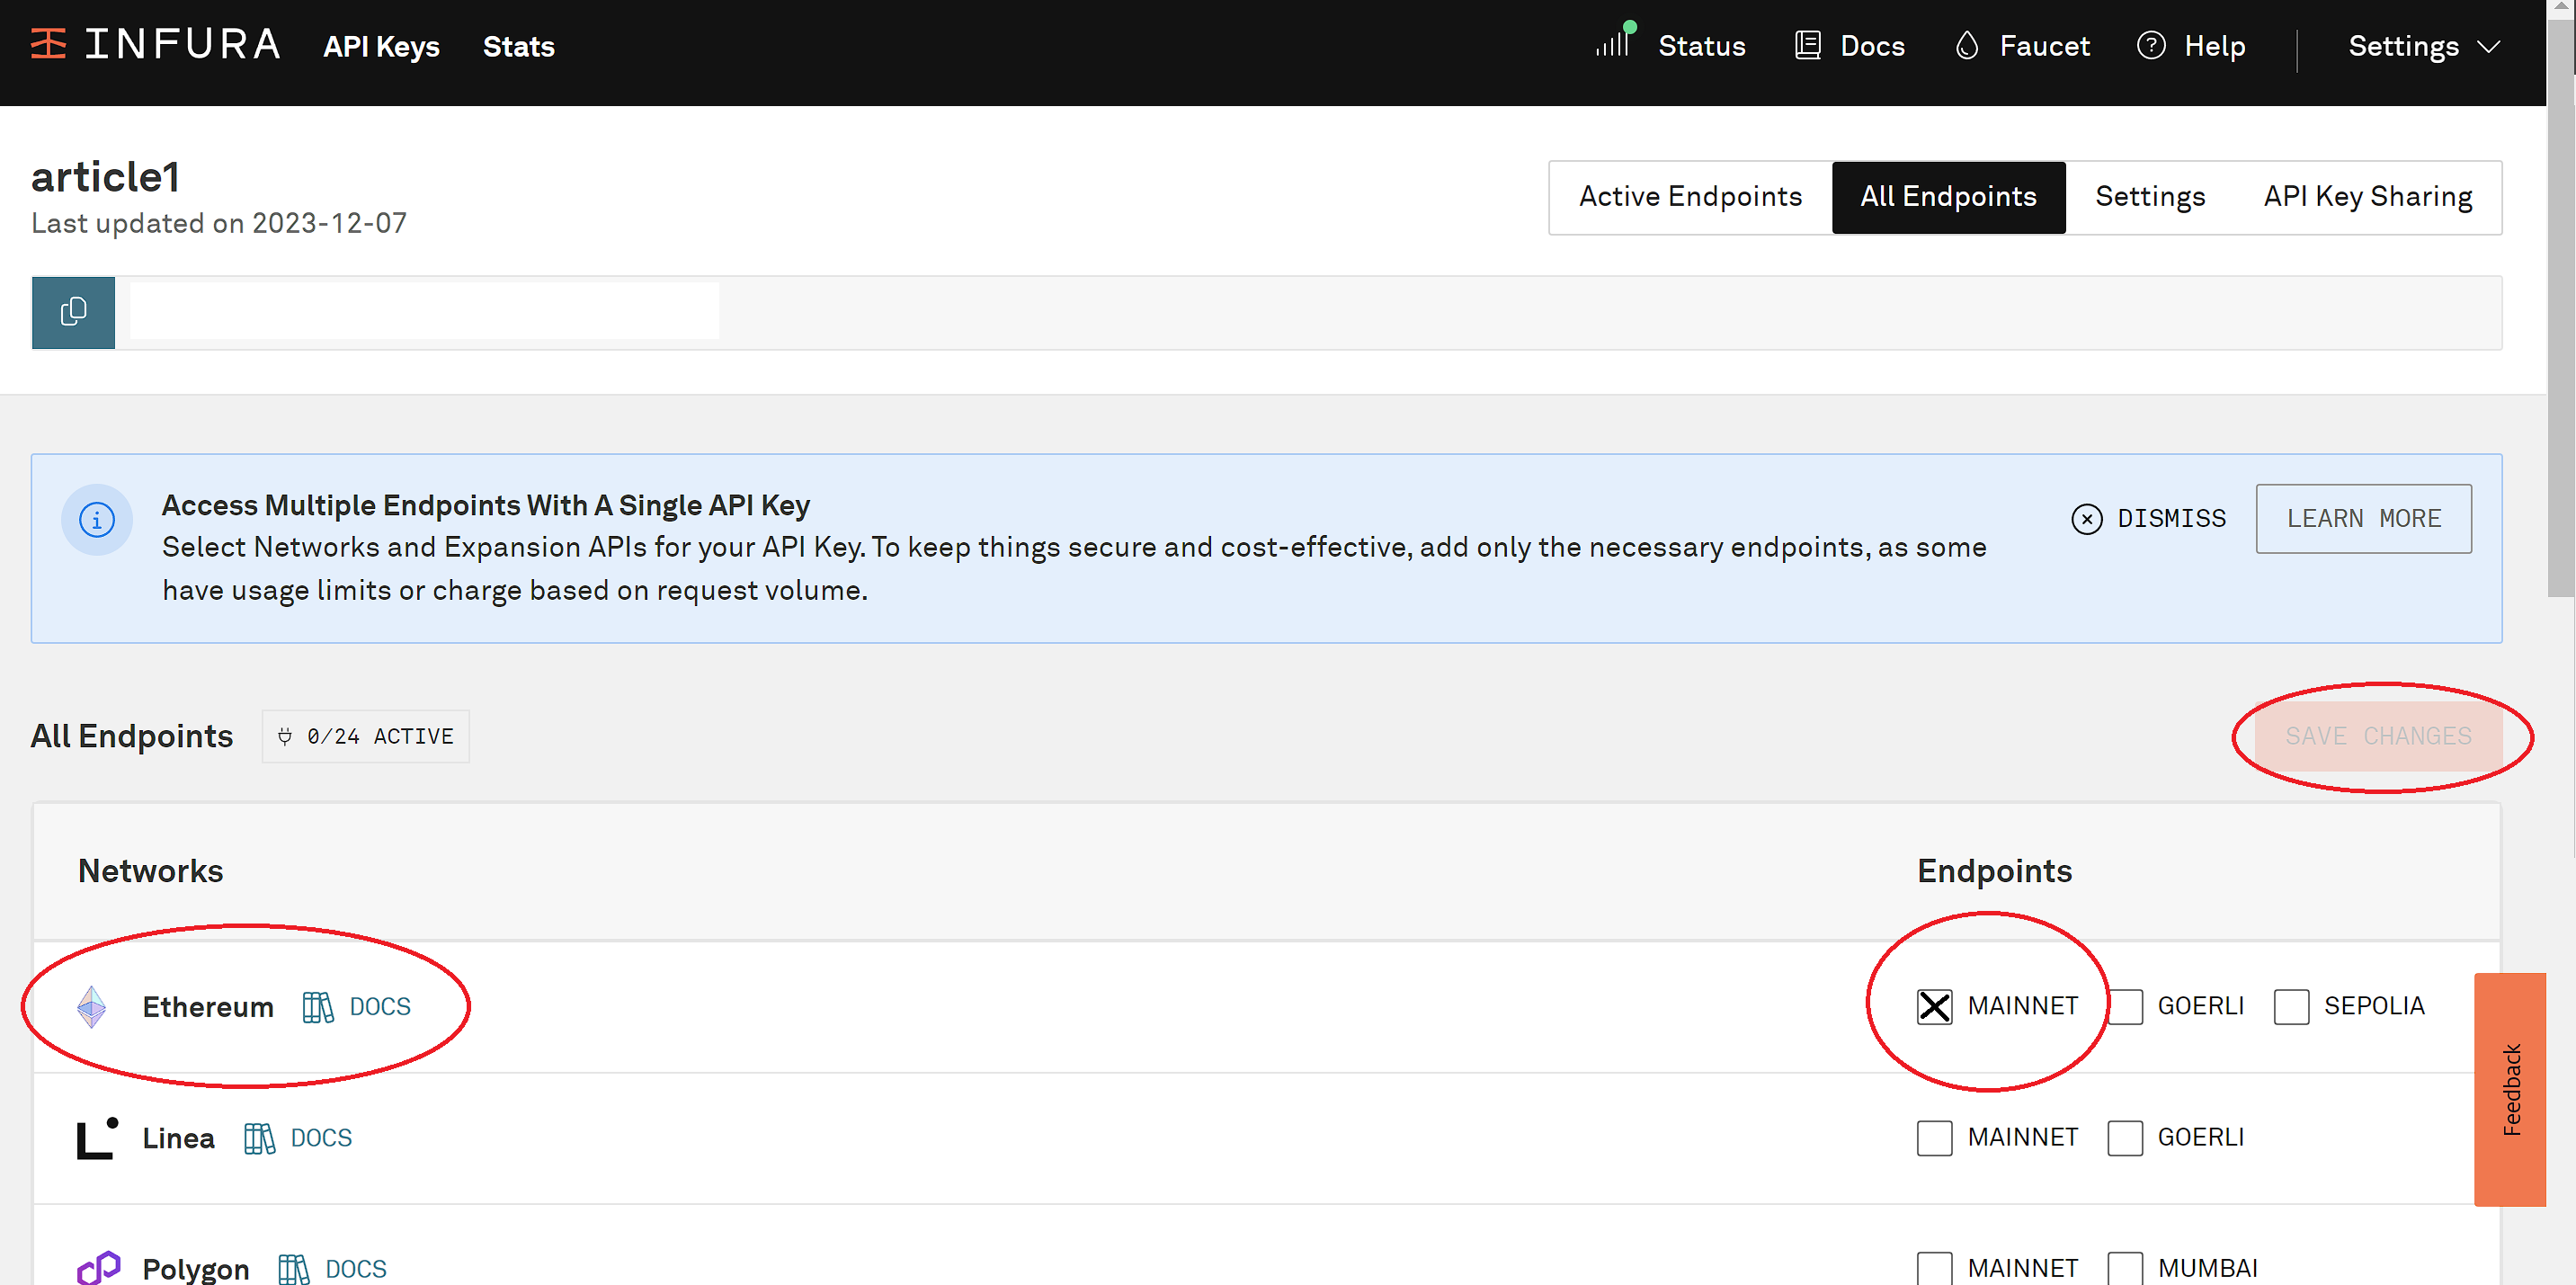
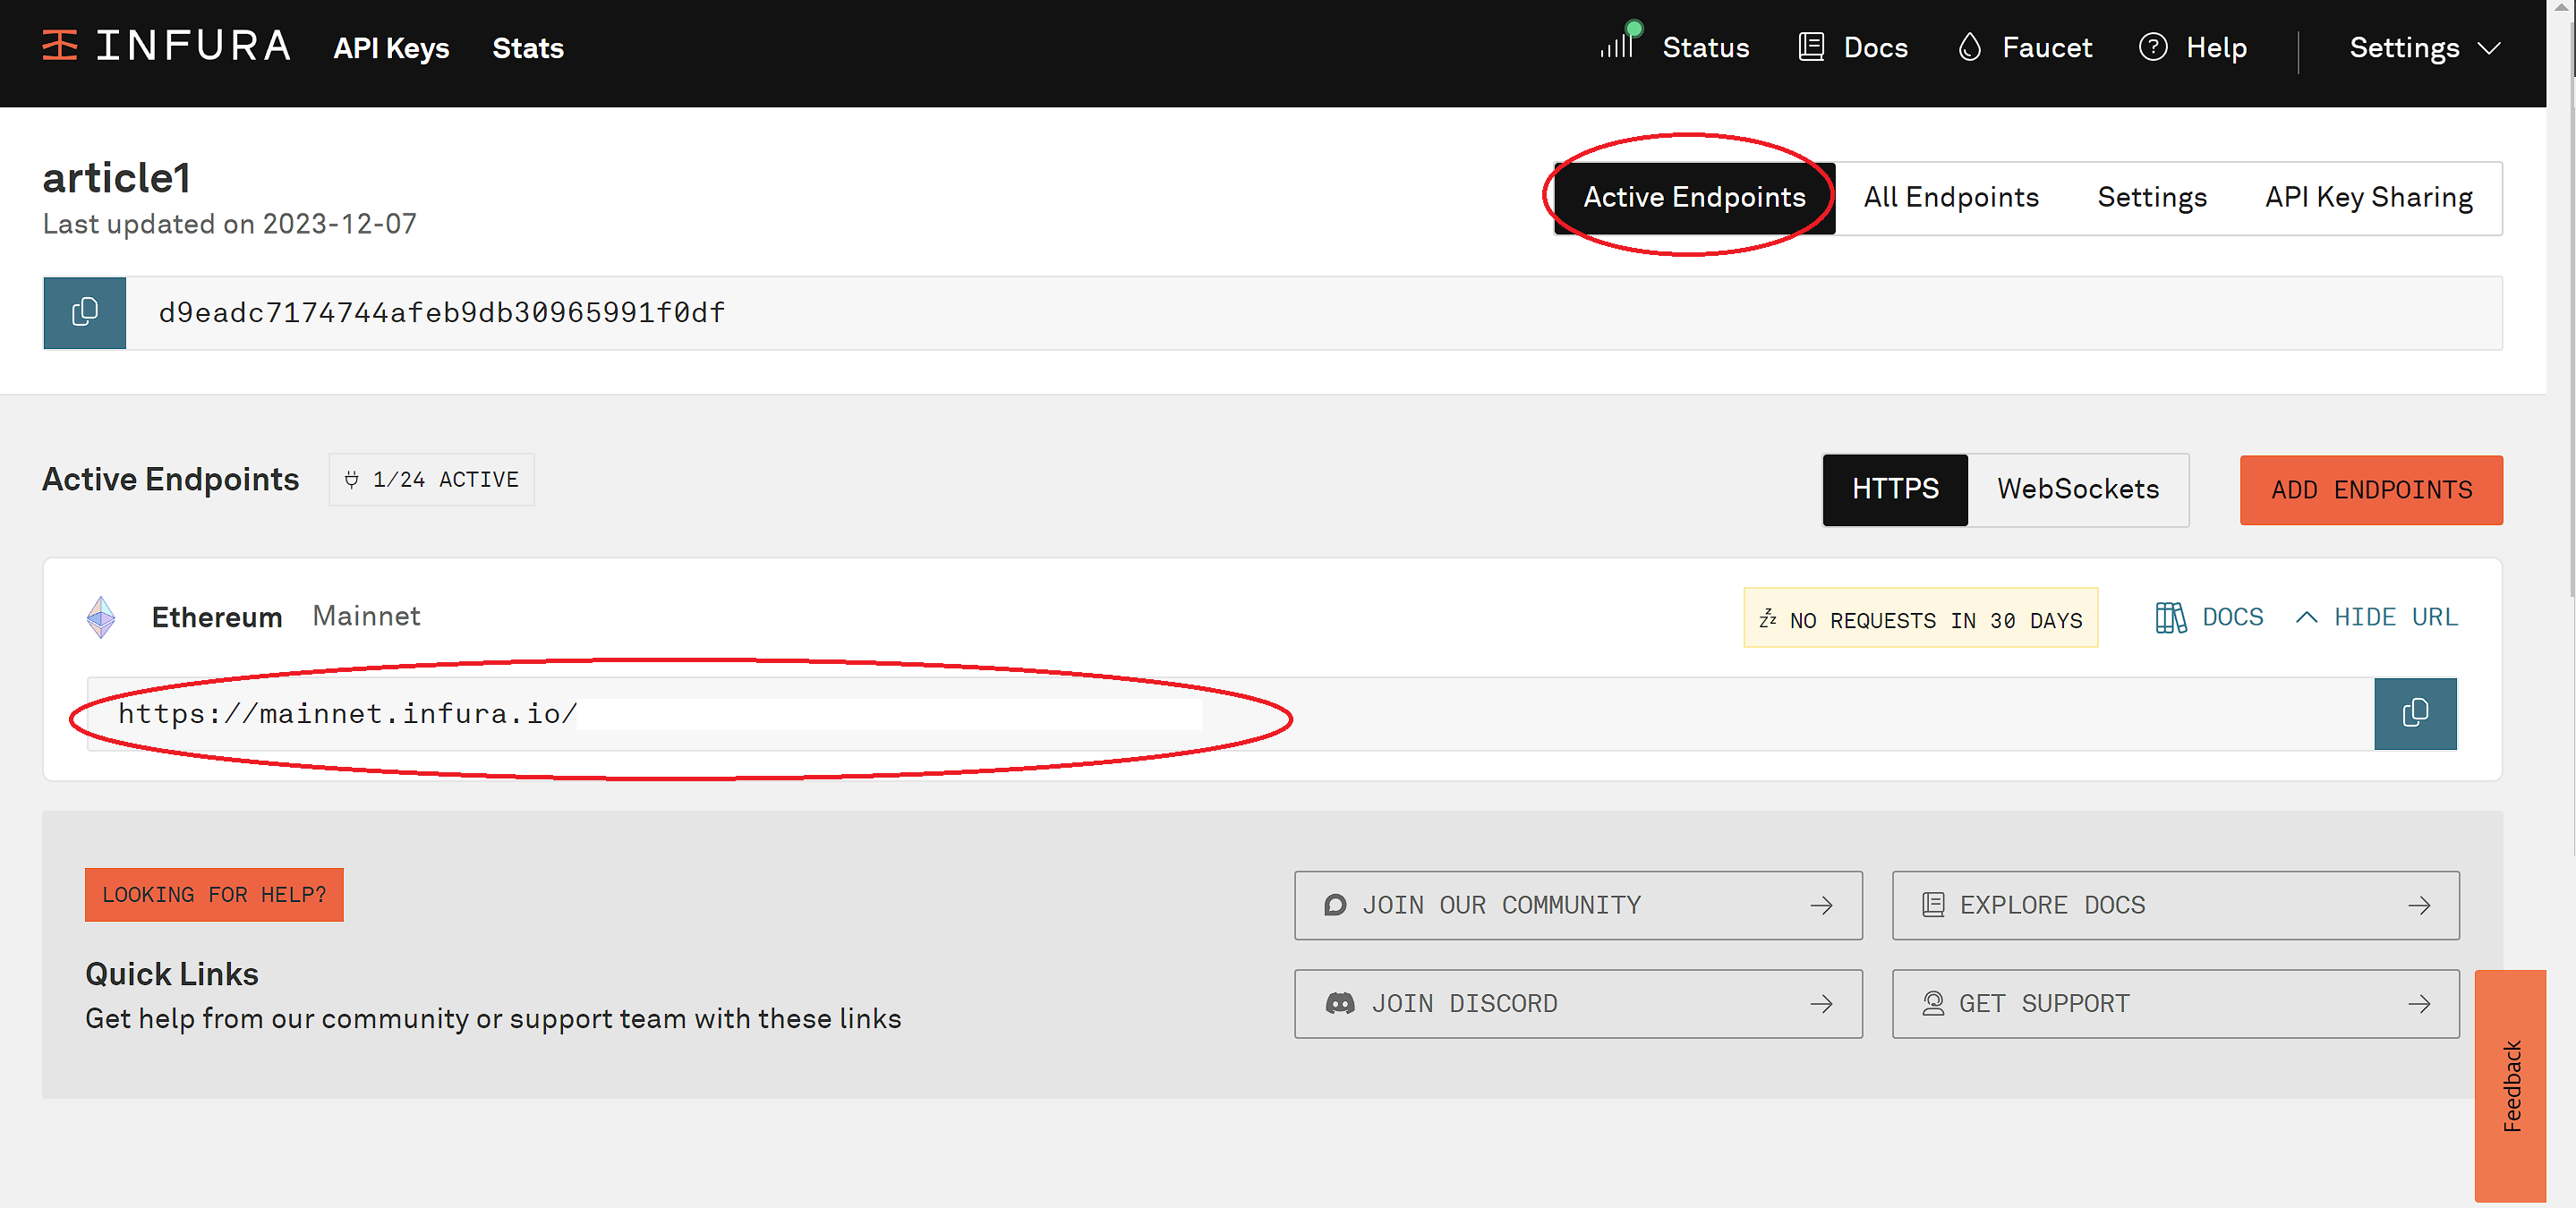
- Go to "active endpoints," and you will find your newly created Ethereum endpoint!🎉
NOTE: I'm hiding the keys so no one uses them to interact with the blockchain, as we only have certain requests for free. After that, the service is paid🔒
Web3 initialization
It's time to create the script to interact with the Ethereum blockchain!
- Create a JavaScript file (e.g., index.js)
- The first thing we have to do is to import web3 by writing:
const {Web3} = require("web3");
- Then, we can initialize the web3 object with the provider (don't forget to copy/paste your Infura endpoint inside the Web3 ("Your Infura Endpoint").
const web3 = new Web3("https://mainnet.infura.io/v3/abc123def456")
- We're all set to use the web3.js library to interact with the Ethereum blockchain, so let's write a main function (I'll use the async await, but you can use promises as well).
async function main() {
const lastBlock = await web3.eth.getBlockNumber();
console.log("The last block is:", lastBlock);
}
main();
- Time to run the script! Go to your terminal and run the command:
node index.js
- Done! You should get printed in your console something like The last block is: 18736120n
NOTE: The result may vary depending on the current block when you are running this script 😜

Now what? 🤔
Feel free to explore the other functions that web3.js provides to interact with the blockchain. A few examples: web3.eth.getBalance(), web3. eth.getChainId(), web3.eth.getGasPrice(), web3.eth.getTransactionCount(), and much more that we will explore in the next tutorials!
You can explore our docs to find other functions.
Suppose you want to interact with other EVM-compatible blockchains (Polygon, Mumbai, Sepolia, Binance Smart Chain, Avalanche, etc.). In that case, you just need to go to Infura, get the API endpoint for that specific network, and initiate a Web3 provider with that endpoint—simple as that!
If you face any issues while following this article, please join our Discord and ask for some community support in the #web3-general channel! 🤝🛠️
You can find the code here. If you prefer a video version, check out the introduction below!
About ChainSafe
ChainSafe is a leading blockchain research and development firm specializing in protocol engineering, cross-chain interoperability, and web3-enabled gaming. Alongside its contributions to major ecosystems such as Ethereum, Polkadot, and Filecoin, ChainSafe creates solutions for developers and teams across the web3 space utilizing expertise in gaming, interoperability, and decentralized storage. As part of its mission to build innovative products for users and improved tooling for developers, ChainSafe embodies an open source and community-oriented ethos to advance the future of the internet.
Website | Twitter | Linkedin | GitHub | Discord | YouTube | Newsletter